


Choosing beautiful wallpaper is an exciting part of decorating your home. You might already have selected a floral design for your bedroom, a textured finish for your living room or an elegant pattern for your TV wall.
But there is one important step that homeowners sometimes overlook: preparing the wall before wallpaper installation.
Even a high-quality wallpaper design may not give the expected result if the surface underneath is uneven, damp, dusty or damaged. Proper preparation helps create a suitable surface for installation and can prevent avoidable problems later.
Whether you are planning to install wallpaper yourself or hire a professional, understanding wall preparation can help you make better decisions.
In this guide, we explain how to prepare your walls before installing wallpaper, what problems to check and which mistakes to avoid.
Why Is Wall Preparation Important Before Installing Wallpaper?

Wallpaper is installed directly onto a wall surface. This means the condition of the wall can affect the appearance and installation of the finished design.
Preparing the wall is important for several reasons:
- A smoother appearance: Uneven surfaces and visible defects can affect the final finish.
- Better installation conditions: Dust, loose paint and dirt can interfere with the installation process.
- Fewer visible imperfections: Filling cracks and repairing damaged areas helps create a more consistent surface.
- Moisture prevention: Identifying dampness before installation helps avoid covering an underlying problem.
- Improved pattern appearance: A properly prepared surface makes it easier to achieve neat alignment.
Wall preparation should always follow the requirements of the wallpaper material and adhesive being used.
Step 1: Inspect the Wall Carefully

Before purchasing installation materials or starting work, examine the wall you want to decorate.
Look for:
- Cracks and small holes
- Peeling or flaking paint
- Damp patches or water stains
- Uneven plaster
- Grease, dirt or dust
- Old wallpaper or adhesive residue
- Signs of mould or water leakage
Pay particular attention to corners, areas near windows and sections close to plumbing.
If you notice active water leakage, persistent dampness or mould, resolve the underlying issue before installing wallpaper. Covering these problems with wallpaper will not fix them.
Step 2: Remove Old Wallpaper

If the wall already has wallpaper, check whether it needs to be removed before installing a new design.
Installing new wallpaper over an existing layer is not suitable for every product or wall condition.
Old wallpaper may have loose edges, damaged sections or an uneven surface. These imperfections can become visible through the new installation.
A typical removal process involves:
- Protecting the floor and nearby furniture.
- Checking the existing wallpaper material.
- Using a suitable removal method.
- Removing remaining adhesive where necessary.
- Allowing the wall to dry completely.
- Checking the exposed surface for damage.
Use removal products and tools according to their instructions. Avoid damaging the plaster underneath.
Step 3: Clean the Wall Surface
Dust, dirt and grease can affect the suitability of a wall for wallpaper installation.
Start by removing loose dust with a clean, dry cloth or suitable brush.
For washable painted surfaces, use an appropriate cleaning method if needed. Do not soak the wall, and allow it to dry fully before proceeding.
Pay attention to:
- Areas behind furniture
- Corners and edges
- Spaces near switches
- Areas around windows
- Sections that may have accumulated grease or dirt
The correct cleaning method depends on the existing wall finish. Always avoid harsh cleaning methods that could damage the surface.
Step 4: Repair Cracks and Holes

Small cracks, nail holes and surface damage should be repaired before wallpaper installation.
A typical repair process includes:
- Removing loose material around the damaged area.
- Applying a suitable wall filler.
- Allowing the filler to dry according to its instructions.
- Sanding the repaired area if required.
- Removing the resulting dust.
Larger cracks or recurring cracks may indicate a deeper problem. These should be assessed before covering the wall.
Remember that wallpaper is a decorative wall covering, not a substitute for repairing structural or surface damage.
Step 5: Make the Wall Surface Smooth

After repairs, inspect the wall from different angles.
Uneven plaster, raised patches and rough areas can affect how wallpaper looks once installed.
Use suitable sanding and surface preparation methods to create a reasonably smooth finish.
You may need professional assistance if the wall has:
- Large uneven patches
- Damaged plaster
- Extensive cracks
- Deep surface imperfections
- Areas with previous water damage
The required level of smoothness depends on the wallpaper design. Thin or smooth finishes may reveal imperfections more easily than some textured designs.
Step 6: Check for Dampness and Moisture

This is one of the most important preparation steps, particularly in areas affected by monsoon humidity, plumbing problems or water seepage.
Before installing wallpaper, check for:
- Dark patches on the wall
- Peeling paint
- Persistent dampness
- Musty smells
- Mould growth
- Water stains near ceilings or windows
Do not install wallpaper over a damp surface.
First identify and repair the source of moisture. Allow the wall to dry and confirm that it is suitable for the selected wallpaper and adhesive.
If dampness keeps returning, consult a qualified professional rather than simply repainting or covering the affected area.
Step 7: Apply the Correct Primer if Required
Some walls need a suitable primer or wallpaper preparation product before installation.
Primer can help prepare the surface according to the requirements of the adhesive and wallpaper system.
However, not every wall needs the same primer.
Consider the following:
- New plaster may require a suitable preparation treatment.
- Previously painted walls may need cleaning and surface assessment.
- Repaired areas may need additional preparation.
- Porous surfaces may require a compatible sealer or primer.
- Certain wallpaper adhesives have specific surface requirements.
Always check the wallpaper and adhesive manufacturer’s instructions before selecting a primer.
Step 8: Allow the Wall to Dry Completely

After cleaning, repairing or applying primer, allow the wall to dry fully.
Installing wallpaper on a surface that is still wet or insufficiently dry can create problems with adhesion and the final finish.
Do not rush this stage.
Drying time depends on the repair material, primer, wall condition, room temperature and ventilation.
Follow the instructions provided with the products you are using.
Step 9: Measure the Wall Before Installation

Once the surface is ready, measure the wall accurately.
You will generally need:
- Wall width
- Wall height
- Door dimensions
- Window dimensions
- Number of walls being covered
- Wallpaper roll or panel dimensions
- Pattern repeat, if applicable
For example, a wall measuring 12 feet wide and 9 feet high has a total surface area of 108 square feet before accounting for openings.
However, the quantity of wallpaper cannot always be calculated by simply dividing the wall area by the roll area. Pattern matching, trimming, roll width and installation requirements must also be considered.
For printed designs and large murals, accurate measurements are especially important.
Step 10: Check the Wallpaper Design and Installation Instructions

Before installation begins, check the product details carefully.
Confirm:
- Wallpaper dimensions
- Material type
- Pattern repeat
- Design direction
- Installation method
- Adhesive requirements
- Cleaning instructions
- Any special surface preparation requirements
Different wallpaper products may use different installation methods.
Some require adhesive to be applied to the wall, while others have different application requirements. Never assume that every wallpaper uses the same installation process.
Common Wall Preparation Mistakes to Avoid

Even attractive wallpaper can produce disappointing results when preparation is rushed.
Here are some common mistakes to avoid:
1. Installing Wallpaper Over Damp Walls

This can hide an existing moisture problem rather than solving it. Identify and repair the source of dampness first.
2. Ignoring Small Cracks
Small imperfections may become noticeable after installation, especially with smooth wallpaper finishes.
3. Leaving Dust on the Surface
Dust and loose particles can interfere with the installation process. Clean the wall properly before proceeding.
4. Applying Wallpaper Over Loose Paint
Peeling or flaking paint creates an unsuitable surface. Remove loose material and prepare the wall correctly.
5. Skipping Measurements
Incorrect measurements can lead to insufficient wallpaper, unnecessary wastage or poorly aligned patterns.
6. Using the Wrong Adhesive
Different wallpaper materials may require different adhesives. Follow the product manufacturer’s recommendations.
7. Rushing the Drying Process
Cleaning, filling and priming materials need sufficient drying time before installation.
Can Wallpaper Be Installed on Different Types of Walls?

The answer depends on the condition of the wall and the wallpaper product.
| Wall type | What to check before installation |
|---|---|
| Painted wall | Paint condition, cleanliness and surface smoothness |
| New plaster wall | Complete drying and suitable surface preparation |
| Previously wallpapered wall | Removal requirements and adhesive residue |
| Concrete wall | Surface smoothness, dust and porosity |
| Gypsum board | Surface condition and suitable preparation |
| Textured wall | Whether the texture needs smoothing |
| Damp wall | Identify and resolve the moisture problem first |
A wall being made of a particular material does not automatically mean every wallpaper can be installed on it. Check the product’s installation guidance.
Should You Install Wallpaper Yourself or Hire a Professional?
Both options may work, depending on the wallpaper design and your experience.
DIY installation may be suitable when:
- The wall is already in good condition.
- The wallpaper has straightforward installation requirements.
- You have the correct tools and materials.
- You can follow the manufacturer’s instructions carefully.
Professional installation may be preferable when:
- The wallpaper has a complex repeating pattern.
- You are installing a large wall mural.
- Several walls need to be covered.
- The wall needs significant preparation.
- Accurate alignment is important.
Professional installation can be especially helpful for large decorative designs where pattern alignment and finishing details matter.
Final Wallpaper Installation Checklist
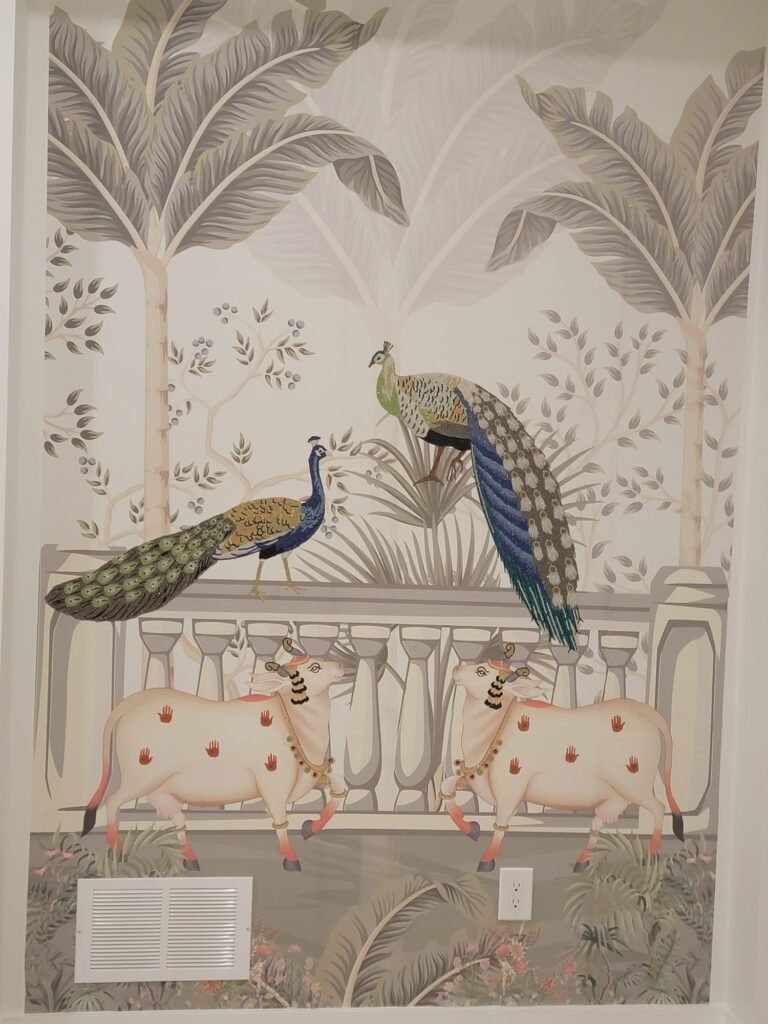
Before starting the installation, use this checklist:
- Wall inspected for cracks and damage.
- Old wallpaper removed where required.
- Dust, dirt and grease cleaned.
- Cracks and holes repaired.
- Uneven areas properly prepared.
- Dampness and leakage issues resolved.
- Suitable primer applied if required.
- Wall allowed to dry completely.
- Wall measurements checked.
- Wallpaper dimensions and pattern repeat verified.
- Correct adhesive and installation instructions confirmed.
Completing these checks can help you prepare for a more organised installation.
Explore Wallpaper Designs at WallKalakar

Once your walls are ready, the next step is choosing a design that complements your home.
At WallKalakar, you can explore different wallpaper styles for bedrooms, living rooms, TV walls and other interior spaces.
Whether you prefer elegant floral patterns, modern geometric designs, luxurious textures, marble effects or artistic wall murals, choose a design that suits your room and personal style.
Before ordering, review the product dimensions, material information and installation requirements.
Explore WallKalakar’s wallpaper collections and find a design for your next home makeover.
Frequently Asked Questions
1. Do walls need to be painted before wallpaper installation?
Not necessarily. The wall needs to be clean, smooth, dry and suitable for the selected wallpaper and adhesive. Some surfaces may require primer or other preparation.
2. Can wallpaper be installed directly on a painted wall?
It may be possible if the paint is firmly attached and the surface is clean, smooth and dry. Loose or flaking paint should be removed and repaired first.
3. Can wallpaper be installed on a damp wall?
No. The source of dampness should be identified and repaired before installation. Covering a damp wall can lead to further problems.
4. Do I need primer before installing wallpaper?
It depends on the wall condition, wallpaper material and adhesive. Follow the manufacturer’s surface preparation instructions.
5. Should old wallpaper be removed before installing new wallpaper?
In many situations, removing the old wallpaper provides a better surface. Whether it is possible to install over an existing layer depends on the materials, condition and product instructions.
6. How smooth should a wall be before wallpaper installation?
The wall should be sufficiently smooth for the selected wallpaper finish. Thin and smooth designs may reveal imperfections more easily than some textured products.
7. Can wallpaper be installed on newly plastered walls?
Only after the plaster has dried completely and the surface has received the preparation required by the wallpaper manufacturer.
8. How long should I wait before installing wallpaper after painting?
There is no single waiting time for every wall or paint product. Follow the paint manufacturer’s drying and curing guidance and the wallpaper manufacturer’s preparation requirements.
Conclusion

Preparing your walls before installing wallpaper is just as important as selecting the right design.
Cleaning the surface, repairing cracks, checking for dampness, measuring correctly and following the product’s installation instructions can help you avoid common problems.
Take time to prepare the wall properly before starting your home makeover.
Ready to choose your wallpaper? Explore the collections at WallKalakar and find a design that complements your interior.








Leave a comment